


This 18-10 victory for Maidstone, in heavy, wet conditions at The Mote, appears routine, at first sight, but hides a multitude of ifs and buts.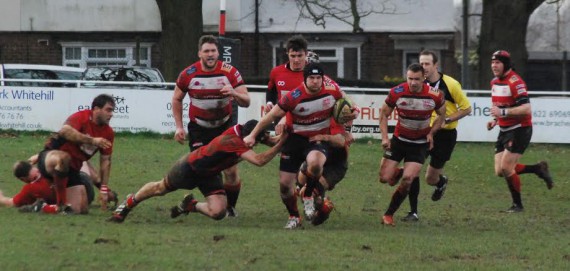
If Maidstone had kicked their goals, this could have been a simpler task; if the basics in the loose had been better, greater game control would have resulted; if Aylesford hadn’t tackled as well as they did, preventing at least two more tries, a bonus point would have resulted.
But this was a thoroughly absorbing game, with two sides playing in contrasting styles, Maidstone running the ball from all over the pitch; Aylesford playing for position through the boot of Harvey and defending like demons.
The final score may not reflect the superiority of the home side for most of the game but with ten minutes of the second half still remaining, Aylesford were within one score of Maidstone and, seemingly, set up for a storming finish that could have changed the result. It was the intervention of Josh Pankhurst at the restart after the Aylesford try, snatching the ball and the initiative back for Maidstone, to complete an outstanding, personal performance.
A deep-bruise injury to Ben Brill in training saw Lee Evans back into the starting fifteen, in the second row, and Josh McKenzie, in his last game before moving to play in Australia, coming in at hooker to replace the unavailable Sam Bailey. Paul Highland bagged a place on the bench, returning to duty after his early season injury. Otherwise, the selection was as expected.
The pattern of the game was set from the outset. Maidstone used their bigger forwards to make carries near to the scrum before moving it wide with No 8, Iles, and scrum half, Morosan, prominant.
But it was from their own 22 that a sweeping move down the right wing saw McKenzie make the vital yards before passing inside to full back, Jensen, before he, in turn, gave the ball to skipper, Williams, to finish the move by the left post. The failure to add the conversion points presaged an afternoon of woeful kicking by Maidstone, but with barely ten minutes on the clock, this lead settled the early nerves.
A penalty miss from the 22, ten minutes later, after Aylesford began to get their own game together, kicking for position and seeking space behind the Maidstone line, rung a few alarm bells but just past the half hour, Maidstone scored a second try.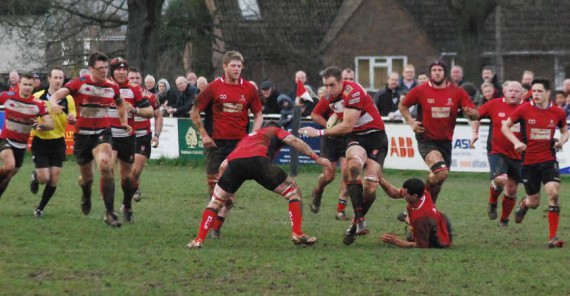
This was initiated from his own 22 by a quick piece of thinking by Sam Brill, taking a mark, tapping and then kicking downfield. The weak kick out by his opposite number was carried forward by second row, Gareth Ellis, and from a penalty in the Aylesford 22, the kick to touch and subsequent catch and drive was finished off, once again, by Ben Williams.
As the half reached its climax, a yellow card for Aylesford wing forward, Wilkins, for pulling down the scrum near the line, added to the visitor’s woes, but it was Aylesford it seemed to galvanise, upping the intensity of their forward play to compensate.
It was only when Maidstone found open ground that the disparity in numbers began to tell and, in added time, Pankhurst, was fed the ball in the Aylesford half and powered past left wing, Stewart, on the 22 to find his way over the line in the corner.
With three tries against no reply, Maidstone had produced the required platform to control the second half and, comfortably, win the game.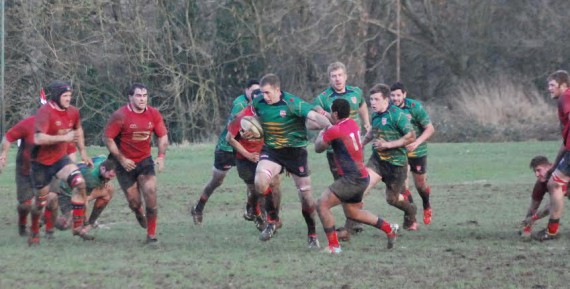
Unfortunately, the visitors had other ideas and their forwards, in particular, upped the intensity of their play, while Maidstone, conversely, lost their early intensity and proceeded to regularly provide turnover ball when they went into contact.
Indeed, some of the forwards breaks were too quick, losing colleagues and getting isolated, rather than trying for a more methodical approach as the pitch cut up and became more difficult to negotiate.
On the quarter hour, Aylesford’s hard work eventually paid off. After a catch and drive from a line out in the Maidstone 22 was held, a quick feed to centre, Johnson, saw him cut through the Maidstone line to score under the posts. The simple conversion by Harvey was gratefully accepted and, as Maidstone got bogged down, Aylesford grew in stature.
As one would expect from a local derby, this was a hard fought contest, played with high intensity and a good spirit. Aylesford, by playing a limited game, tailored to the conditions, gave nothing away Maidstone line to score under the posts. The simple conversion by Harvey was gratefully accepted and, as Maidstone got bogged down, Aylesford grew in stature.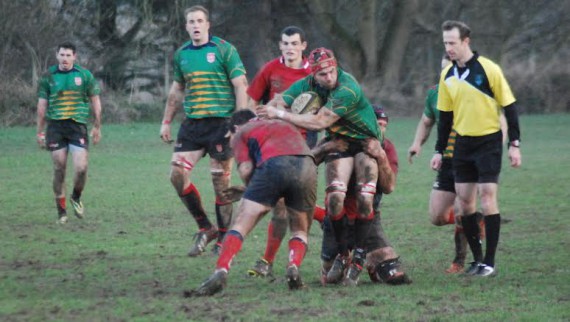
A penalty by Harvey on the half-hour, from forty metres, saw the pendulum swinging further toward the visitors but the catch from the restart by Pankhurst reinvigorated the hosts, with heads visibly lifting as a result.
A series of scrums to Maidstone on the Aylesford five metre line should have delivered the vital fourth try and a bonus point, but the visitor’s defence withstood all that Maidstone threw at them.
With twelve minutes of added time on the clock, a penalty in front of the Aylesford posts was converted by Willie Brown to nullify a losing bonus point for the visitors, rather than seek the elusive fourth try.
As one would expect from a local derby, this was a hard fought contest, played with high intensity and a good spirit. Aylesford, by playing a limited game, tailored to the conditions, gave nothing away: Maidstone, trying to play their usual high tempo game, gave their opponents chances to stay in the match.
In the end, despite the evident jangling nerves on the touchline, as the second half progressed, the right result emerged. But the loss of kicking form of Van de Westerloo needs to be addressed if more high tension occasions are to be avoided.
Maidstone
Ben Williams; Josh McKenzie; Ollie Smith: Lee Evans; Gareth Ellis: Jack Davidson; Josh Pankhurst; Matt Iles: Lucian Morosan; Caleb Van de Westerloo: Sam Brill; Willie Brown; Neil Graves; Mark Dorman: Josh Jensen
Replacements (All used): Nick Bunyon; Paul Highland; Sam McPherson
Pictures supplied by Bob Hayton.